Enable API Gateway Authentication
Amazon API Gateway can use the JSON Web tokens (JWT) returned by Cognito User Pools to authenticate API calls. In this step, you’ll configure an authorizer for your API to use the user pool you created in module 1.
Since Cognito User Pools implements OpenID Connect JSON web tokens, API Gateway is able to compare the signature of an access or identity token against the known public keys of the Cognito User Pool which allows verification and authentication to happen without having to write additional code in your application.
High-Level Instructions
In the Amazon API Gateway console, create a new Cognito user pool authorizer for your API. Configure it to use the user pool that you created in the previous module. You can test the configuration in the console by copying and pasting the identity token printed to the console after you log in via the /signin path of your current website. Once setup, you will change your application’s code to send the proper JSON web token with its API requests to authenticate.
-
In the AWS Management Console choose Services then select API Gateway under Networking and Content Delivery.
-
Choose the API named WildRydes.
-
Under your newly created API, choose Authorizers.
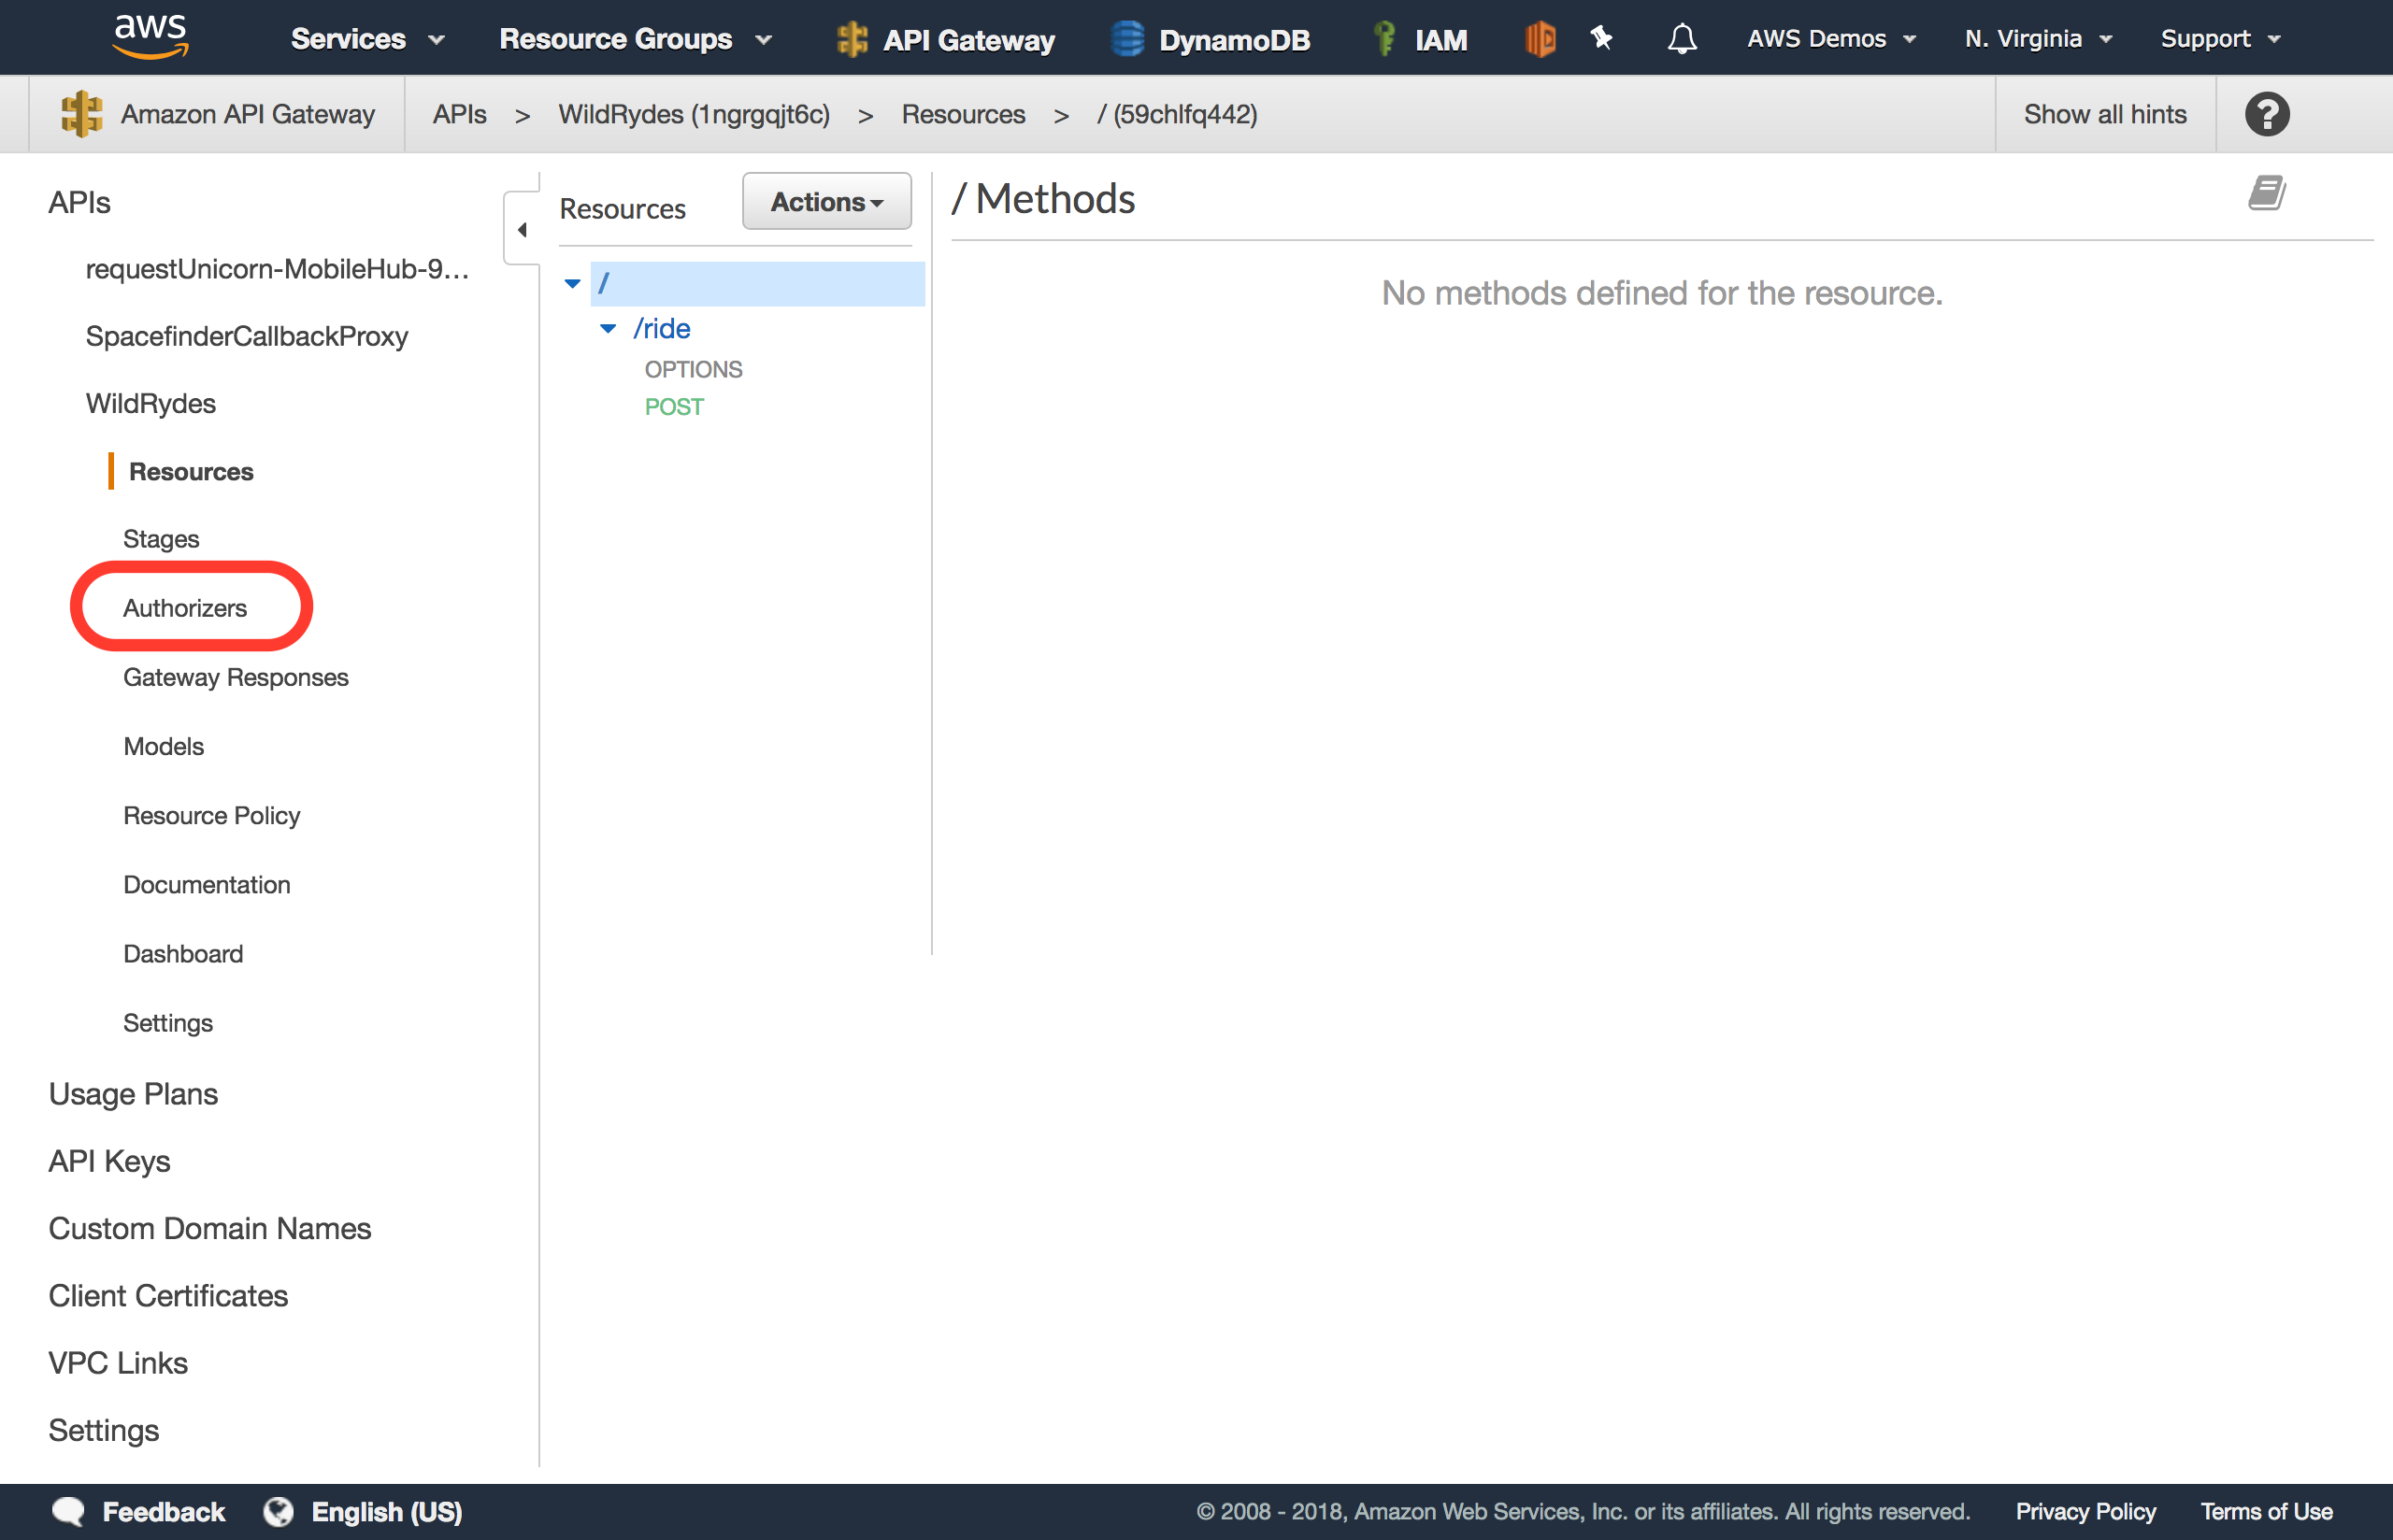
-
Choose Create New Authorizer.
-
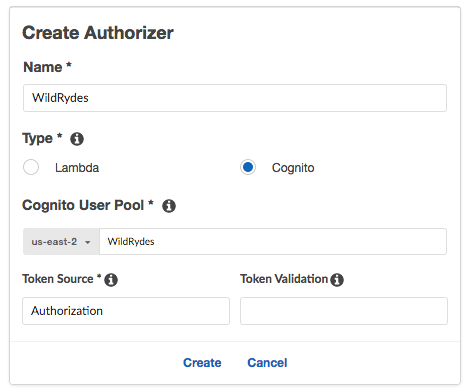
Enter
WildRydesfor the Authorizer name. -
Select Cognito for the type.
-
In the Region drop-down under Cognito User Pool, select the Region where you created your Cognito user pool in the last module (by default the current region should be selected).
-
Enter
WildRydes(or the name you gave your user pool) in the Cognito User Pool input. -
Enter
Authorizationfor the Token Source. -
Leave Token Validation blank without editing.
-
Choose Create.
Verify your authorizer configuration
-
In a different browser tab, return to your Wild Rydes application and sign-in if you’re not already signed in. After signing in, you should be redirected to /app. Open your browser’s developer console and browse to the console log output section.
-
Look for the console log to say Cognito User Identity Token: and a long string beneath the message.
-
Copy the long string to your clipboard without the intro message. You will need to copy across multiple lines to fully copy the token in its entirety.
-
Go back to previous tab where you have just finished creating the Authorizer.
-
Click Test at the bottom of the card for the authorizer.
-
Paste the auth token into the Authorization Token field in the popup dialog.
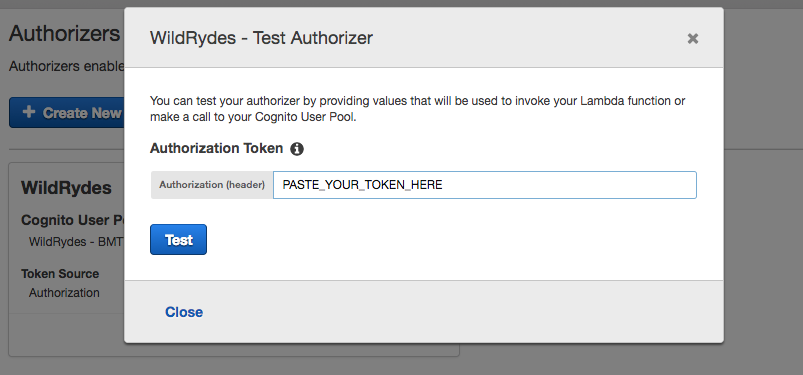
-
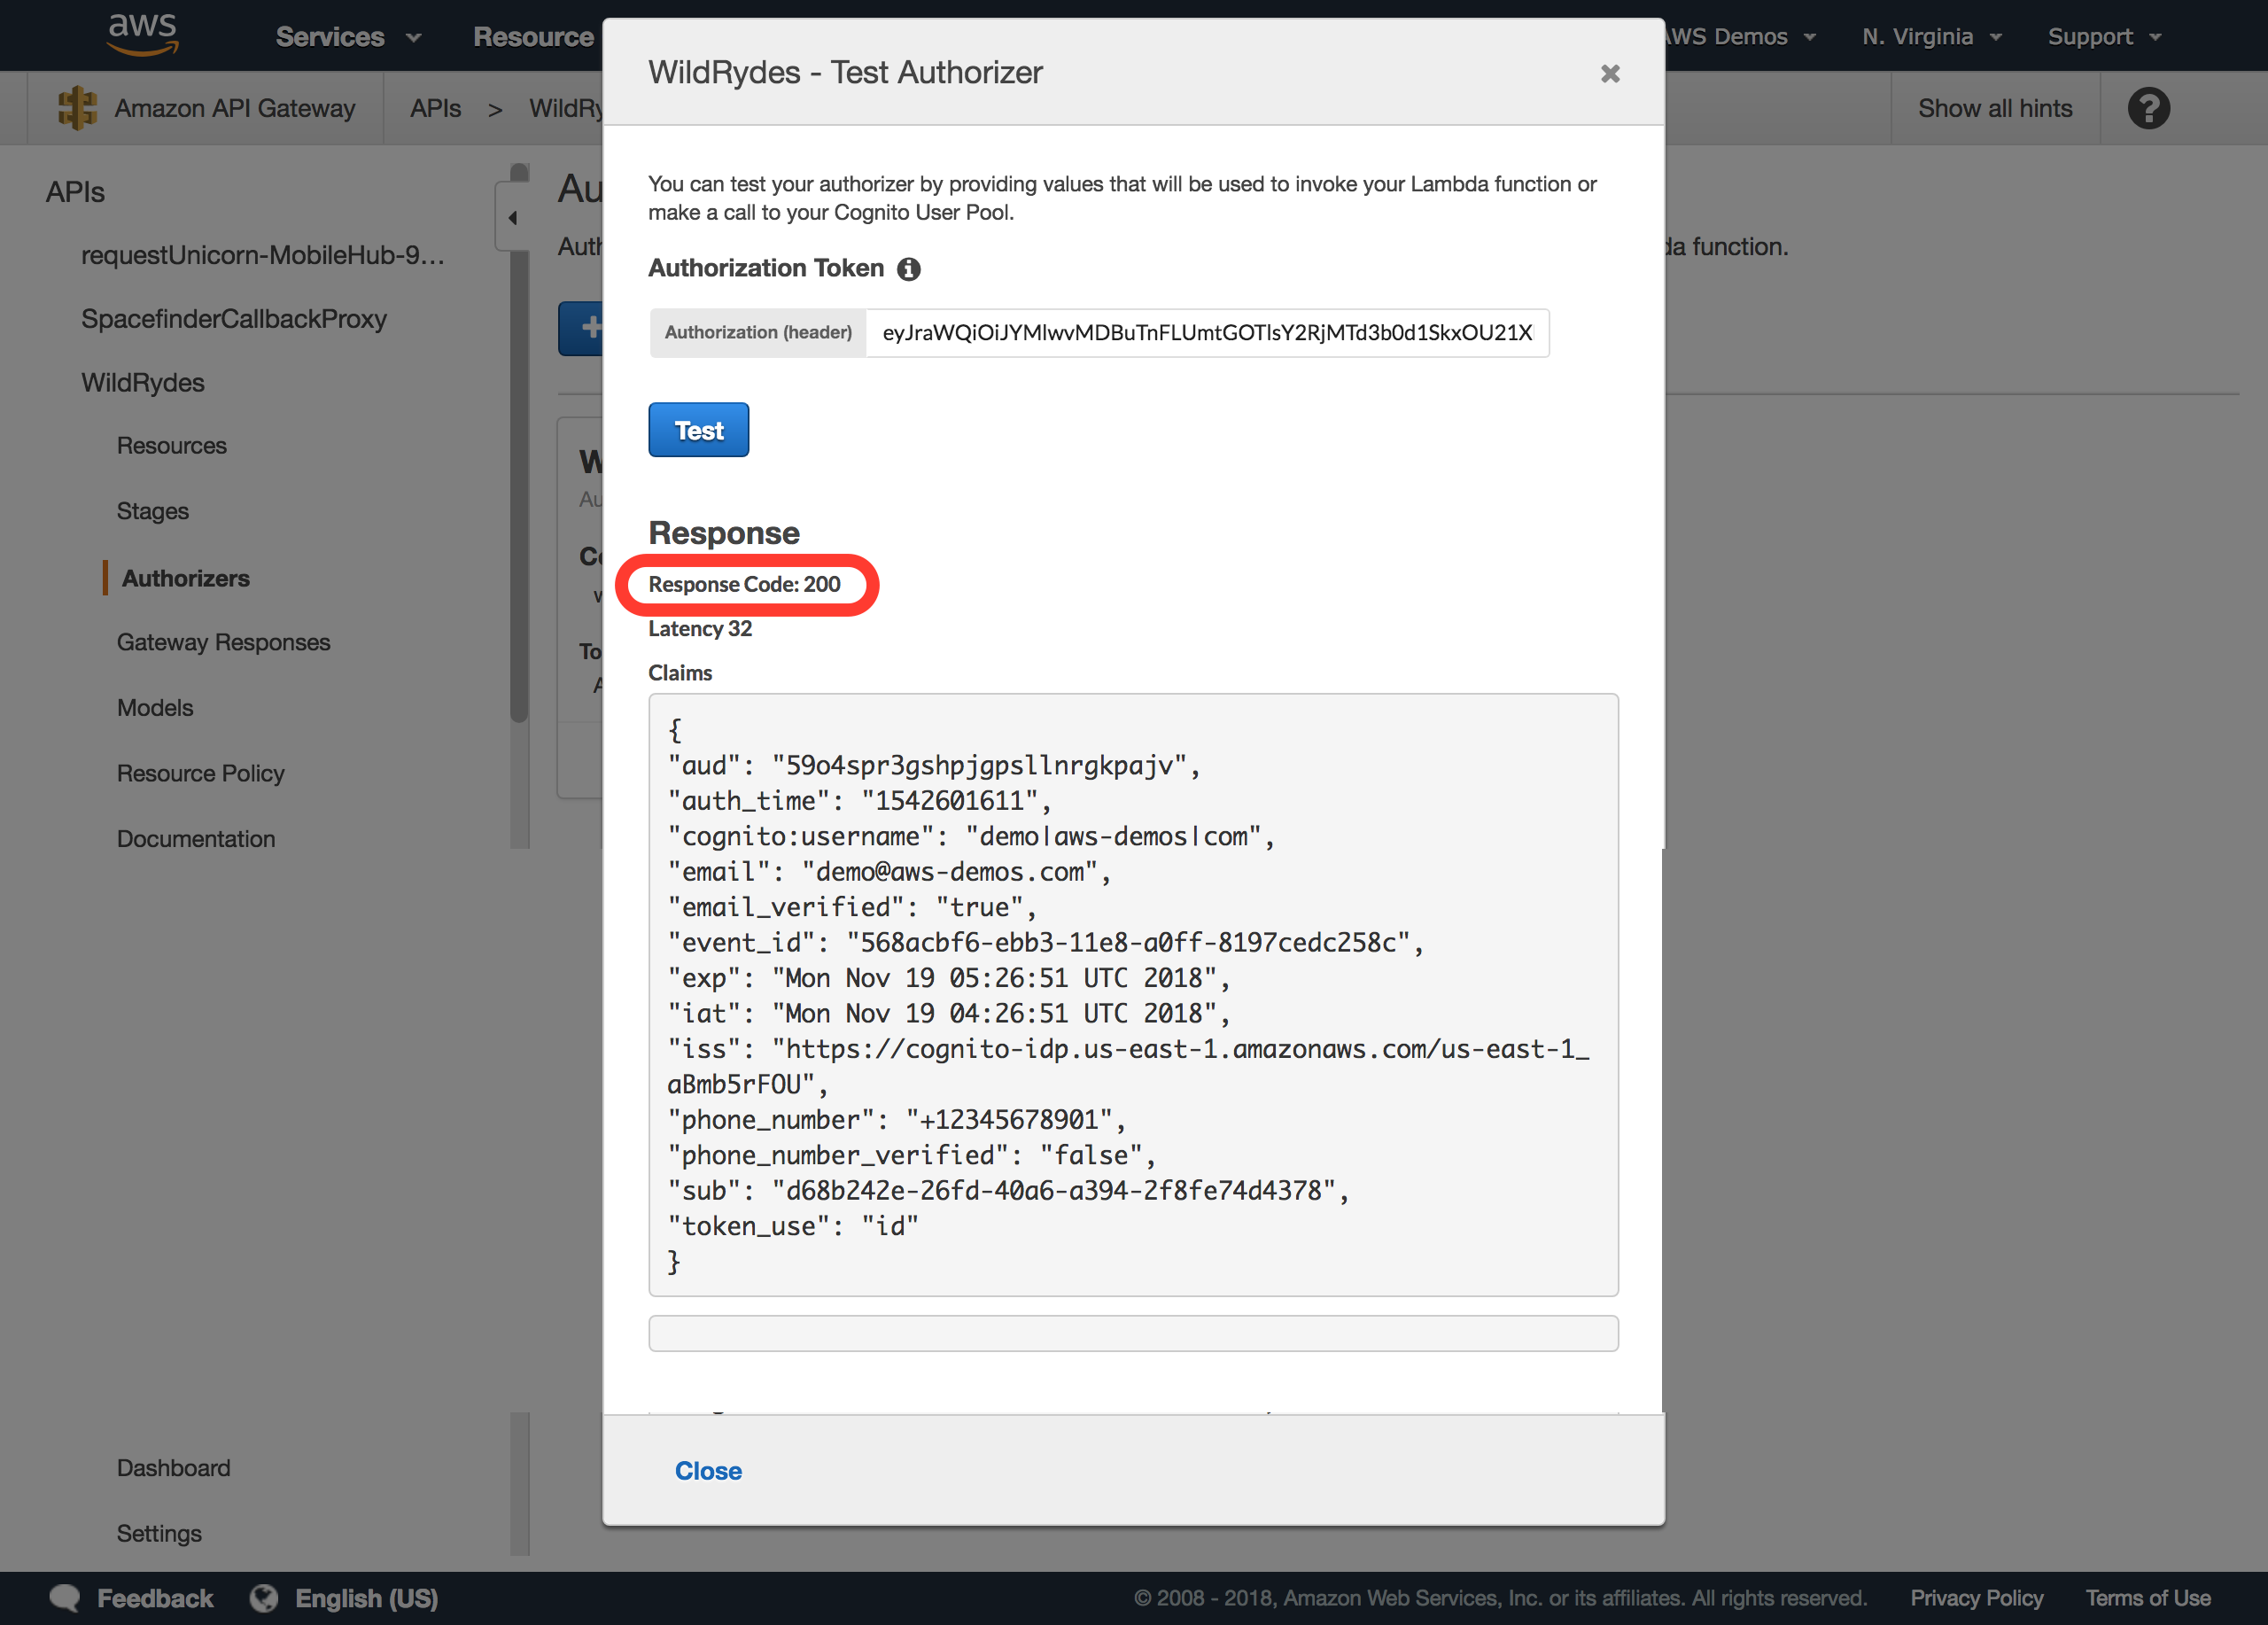
Click Test button and verify that the response code is 200 and that you see the claims for your user displayed. Since this is the identity token, the user’s attributes are encoded within the JWT as claims which can be read parsed programatically.
If you do not receive successful test results as shown below, do not proceed until you’re able to validate the authorizer is configured properly and passes this test.
Require Cognito authentication for API Gateway
-
Browse to Resources while within your Wild Rydes API in the API Gateway console.
-
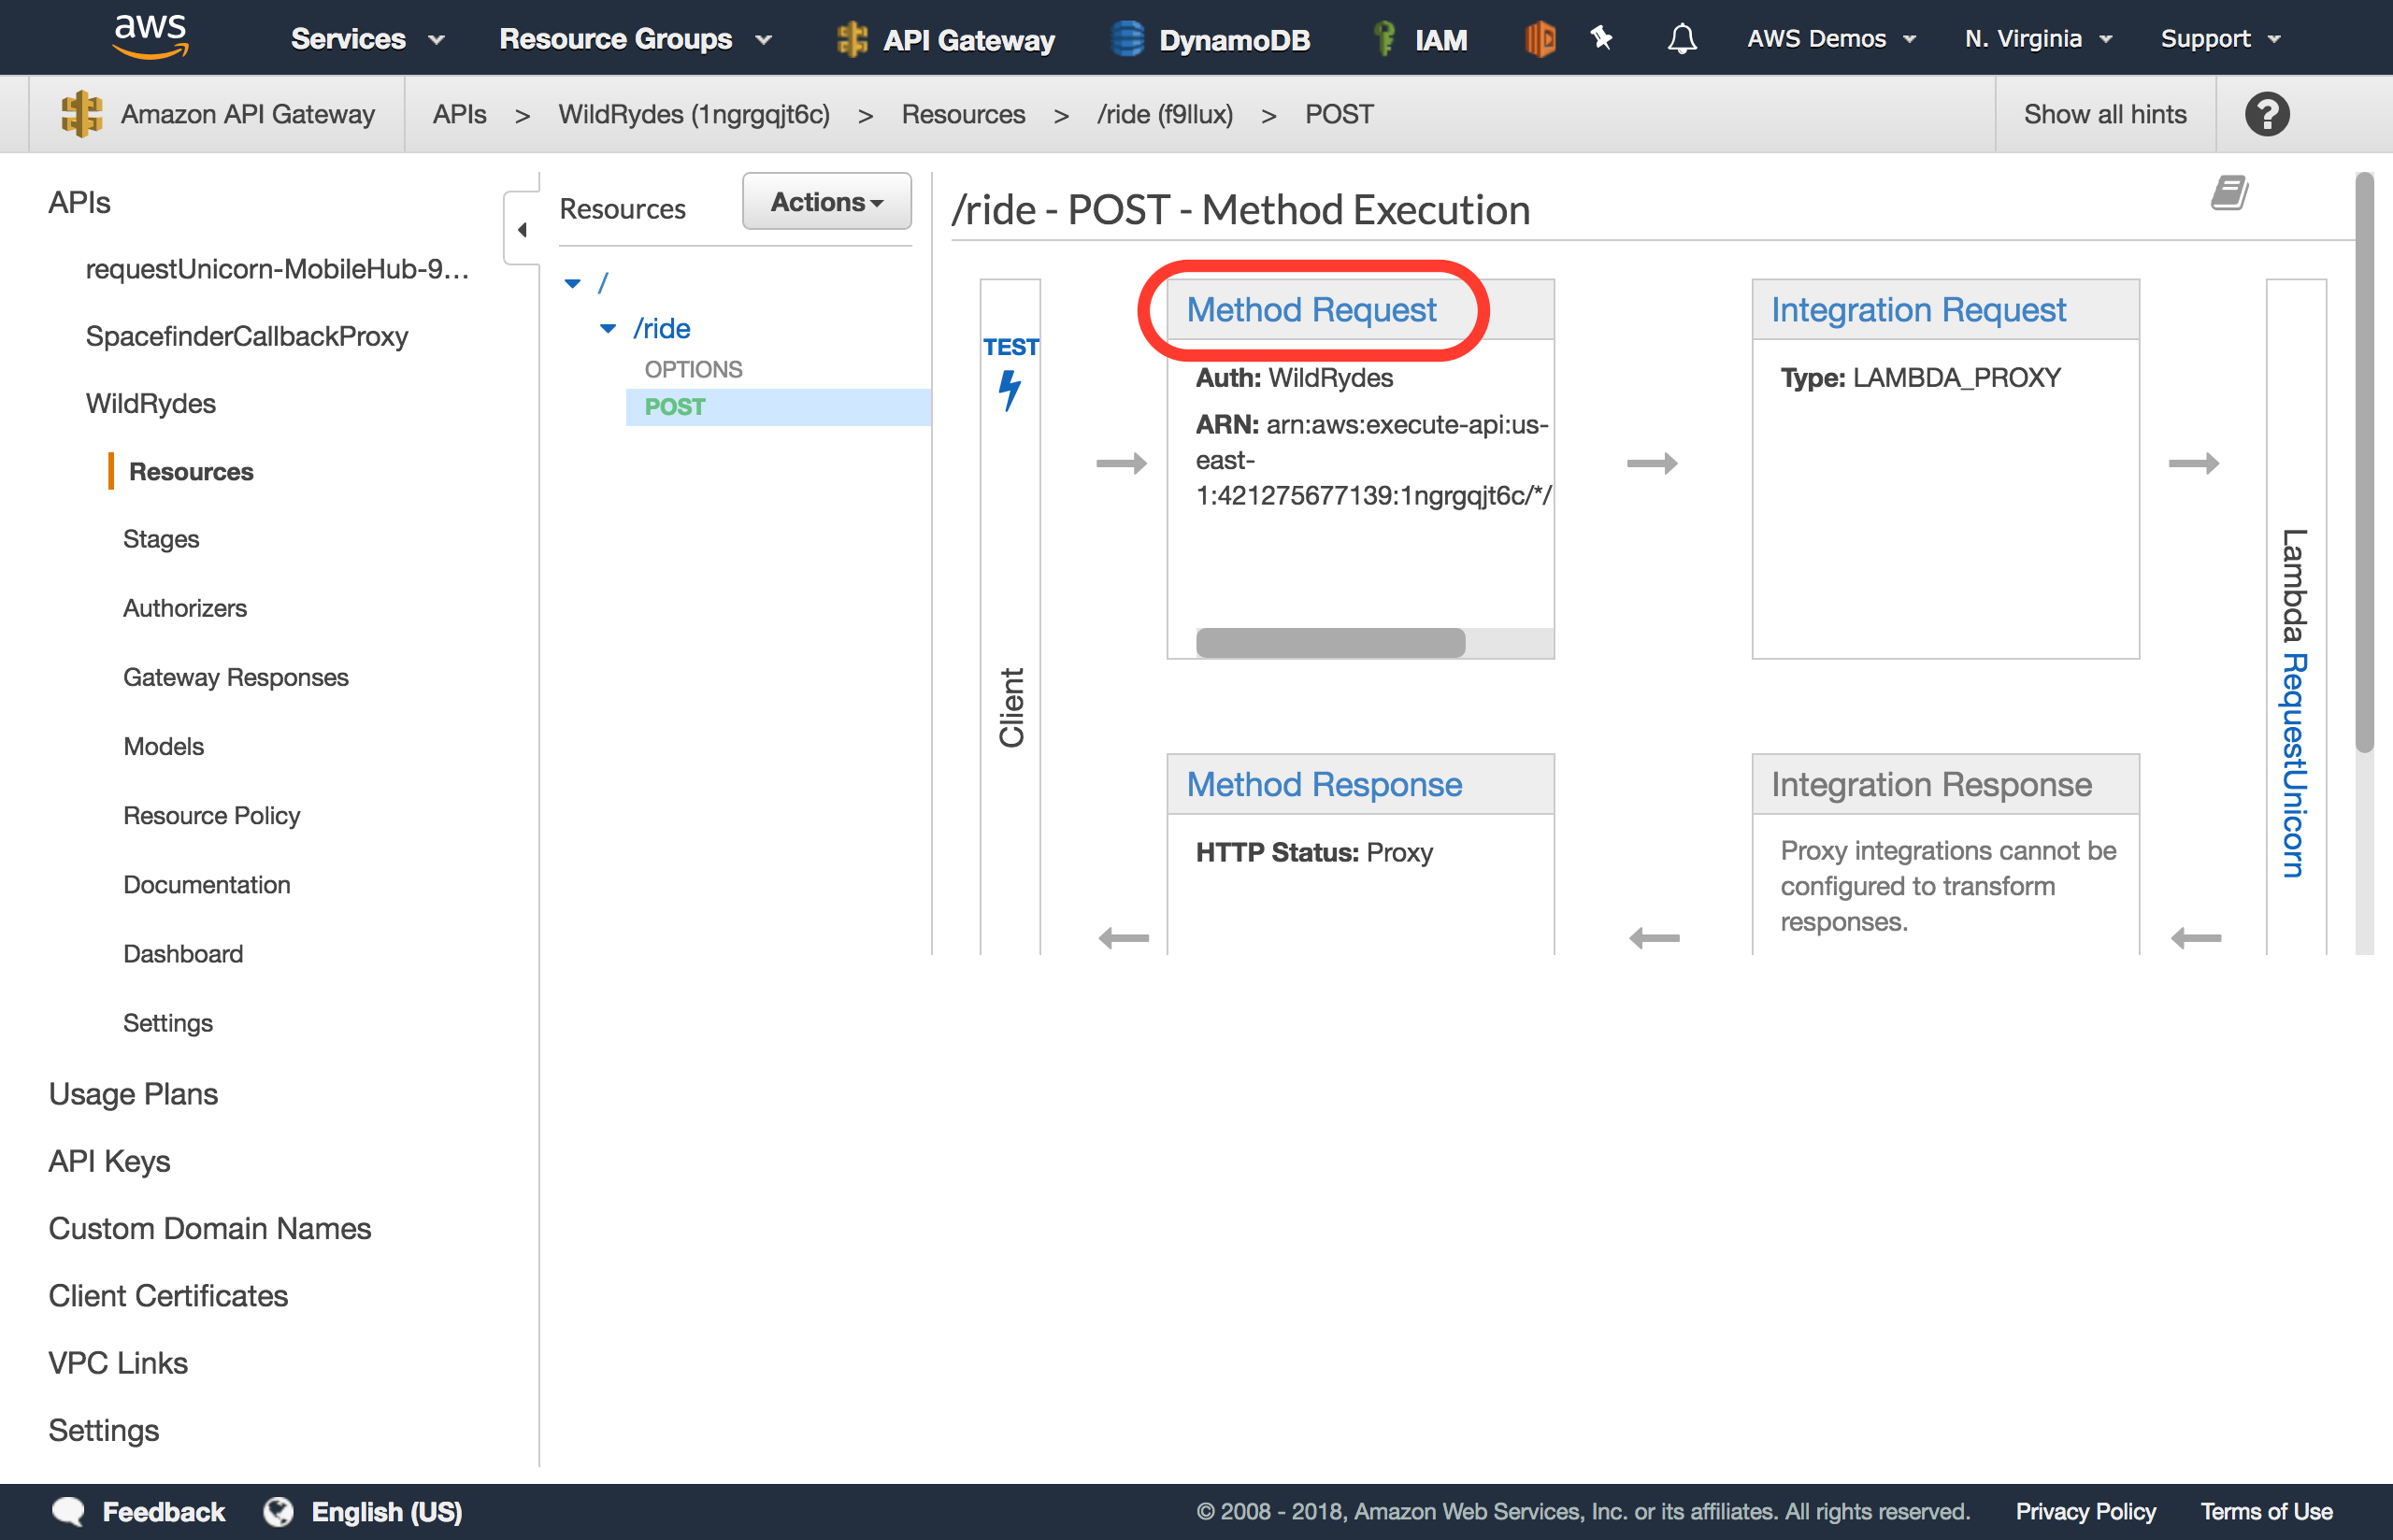
Select the POST method under the /ride resource path.
-
Choose Method Request
-
Choose the pencil icon next to
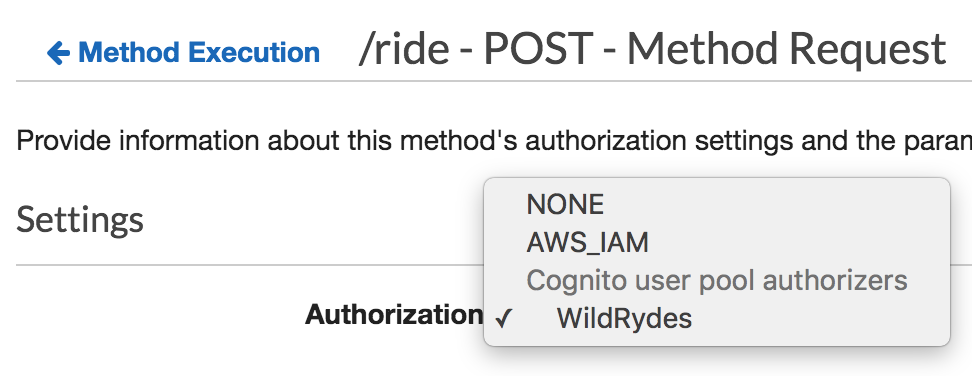
Authorizationto edit the setting. -
Select your new Cognito Authorizer from the list of options presented.
If you don’t see this option listed, Reload the browser page then this authorizer option should appear in the drop-down list.
-
Save your selection by clicking the checkmark icon next to the drop down.

-
Next, choose the Actions button at the top of the resources list.
-
Choose Deploy API from the list of options presented.
-
For deployment stage, select
prodthen click Deploy. -
You’ve now successfully deployed your new authentication integration to your API’s production environment.
Configure your Wild Rydes web app to authenticate API requests
Now that you’ve deployed the new authorizer configuration to production, all API requests must be authenticated to be processed.
-
Return to your Wild Rydes app, sign in at /signin if necessary, and attempt to request a ride.
-
You should receive an Error finding unicorn. If you open the developer console, you will see that we received a HTTP 401 error, which means it was an unauthorized request. To authenticate our requests properly, we need to send an Authorization header.
If you at first still that you requests go through without any errors, try requesting a ride again in 30-60 seconds to allow the API Gateway changes to fully propagate.
-
Go back to Cloud9 and open the /website/src/pages/MainApp.js files.
-
Browse down to the getData method you previously updated. You will notice that the headers for the request currently include a blank Authorization header.
-
Replace your current getData method with the following code which sends your user’s Cognito identity token, encoded as a JSON web token, in the Authorization header with every request.
async getData(pin) { const apiRequest = { body: { PickupLocation: { Longitude: pin.longitude, Latitude: pin.latitude } }, headers: { 'Authorization': this.state.idToken, 'Content-Type': 'application/json' } }; console.log('API Request:', apiRequest); return await API.post(apiName, apiPath, apiRequest); } -
Allow the application to refresh, sign-in again, and request a ride.
-
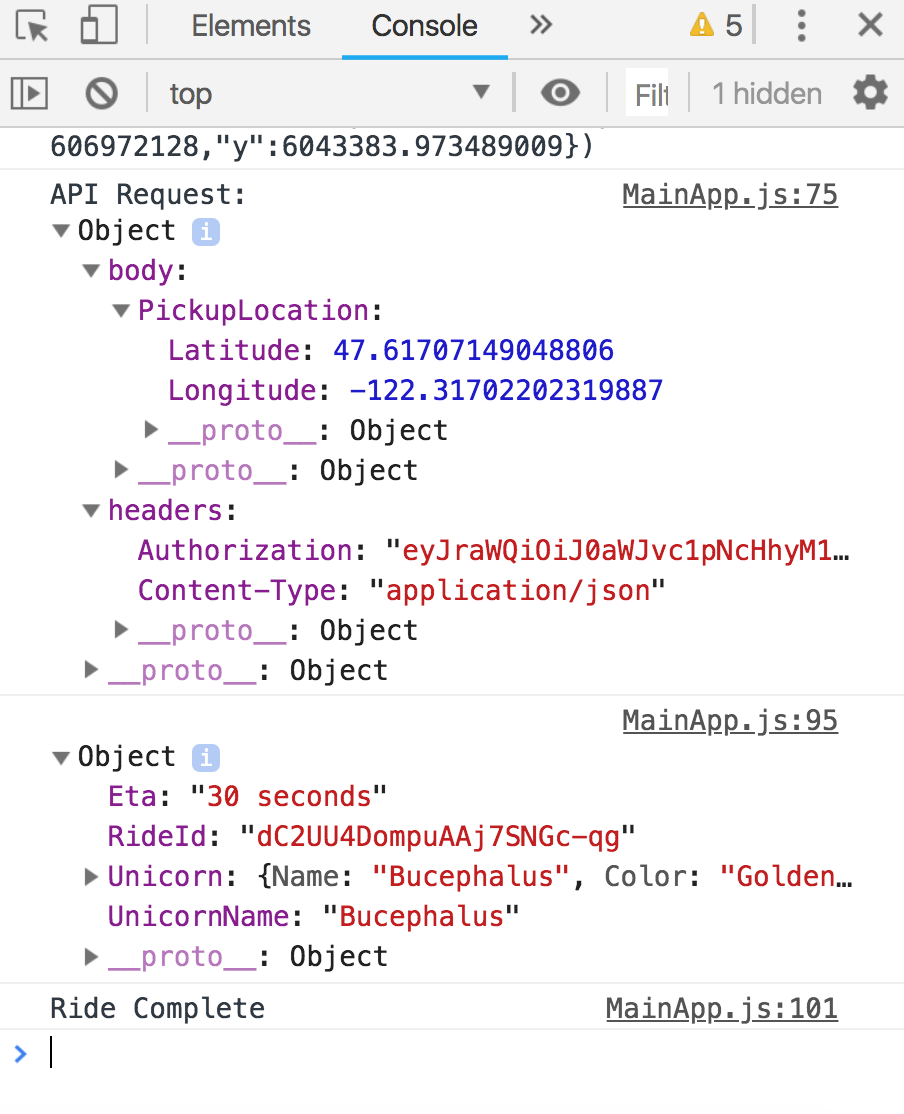
The unicorn ride request should be fulfilled as before now. To see the full request headers which were sent, look at the developer console for an API Request informational message which includes the API Request details once expanded, including the full headers and body of the request.
If the API now invokes correctly and application funcions as expected summoning unicorns, you may proceed to complete either:
Optional module 2 extension with Fine-grained IAM-based authorization with API Gateway
OR
To proceed to the module 3 without completing the optional module extension, choose 3. AWS integration with IAM-based AuthZ on the left side menu.