Enable API Gateway Authorization
In addition to using JSON Web Tokens (JWTs) for authentication, API Gateway can leverage AWS request signing and parse the request signature to determine the requesting user. In this step, you’ll update your authorization type to IAM for your API which will then use AWS’s Identity and Access Management (IAM) capabilities to authorize requests via IAM policies.
High-Level Instructions
In the Amazon API Gateway console, update the authorization type to AWS_IAM for the POST method on the /ride resource. Next, re-deploy the API to make your change take effect.
-
In the AWS Management Console choose Services then select API Gateway under Networking and Content Delivery.
-
Choose the API named WildRydes.
-
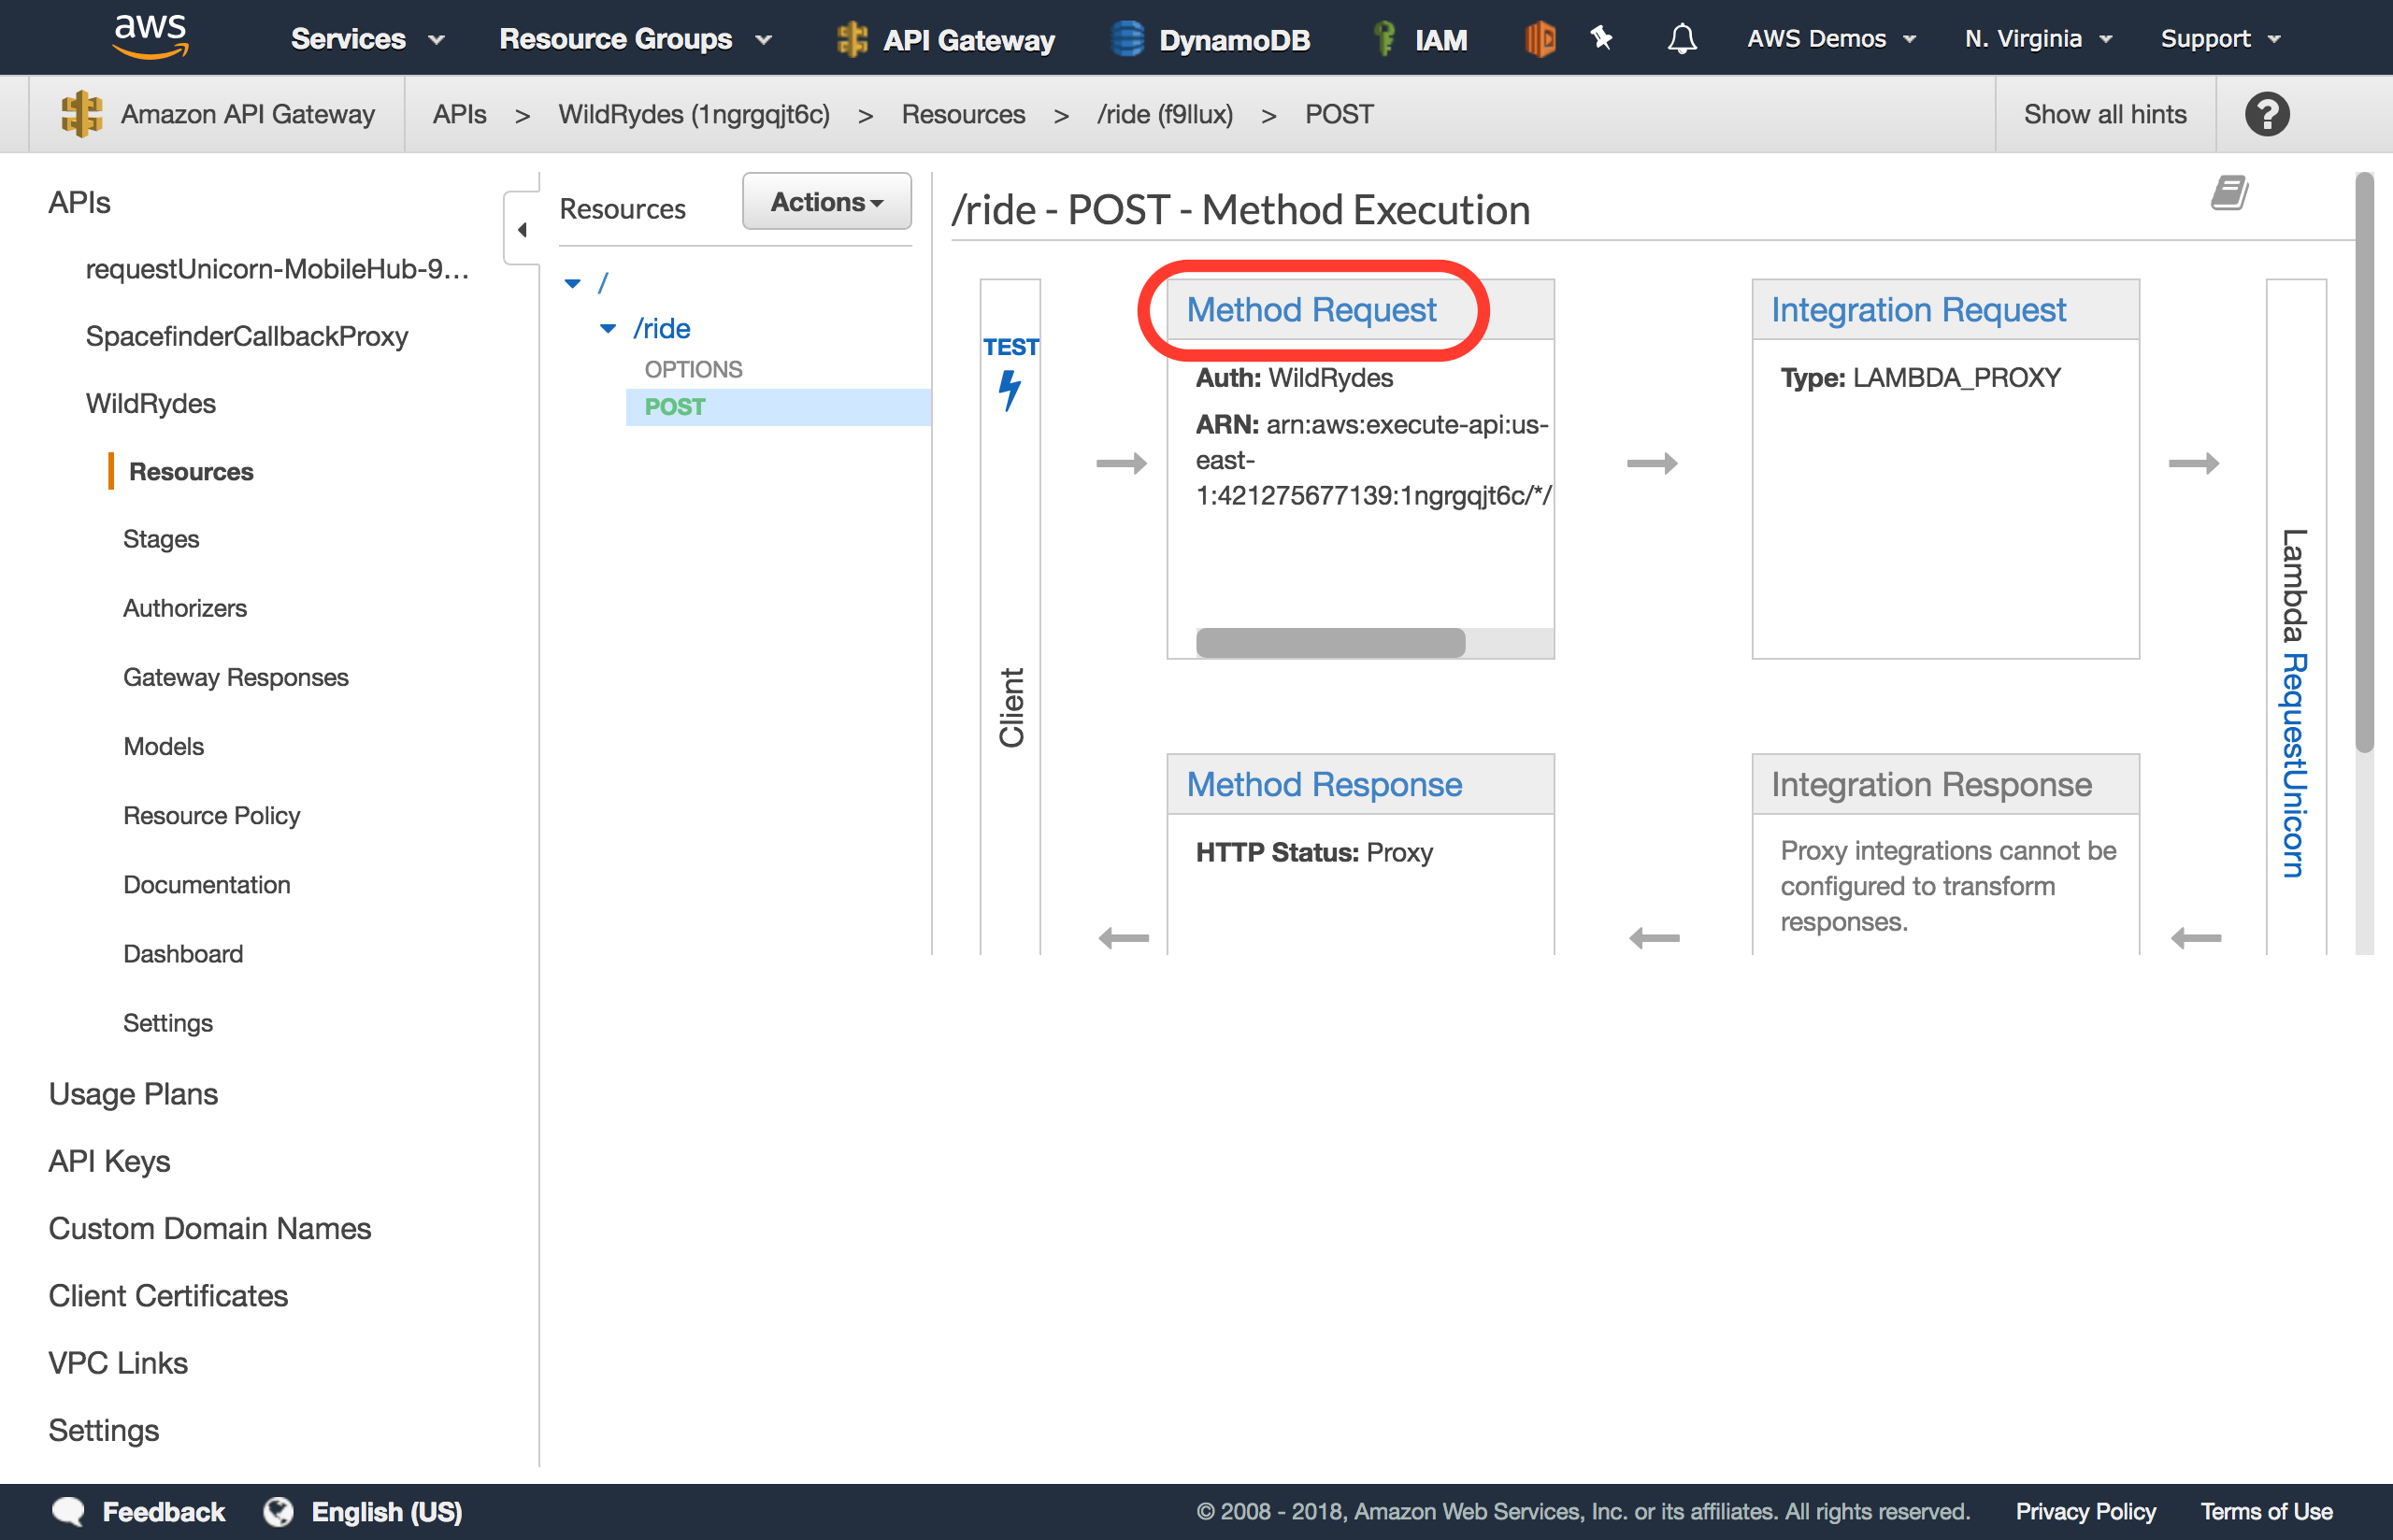
Browse to Resources while within your Wild Rydes API in the API Gateway console.
-
Select the POST method under the /ride resource path.
-
Choose Method Request

-
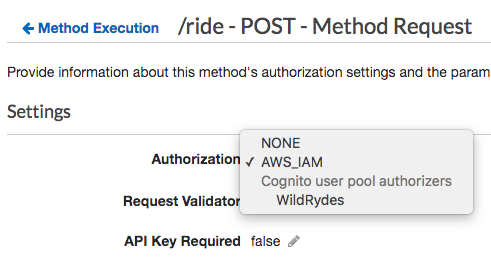
Choose the pencil icon next to
Authorizationto edit the setting. -
Select AWS_IAM from the list of authorization options presented.

-
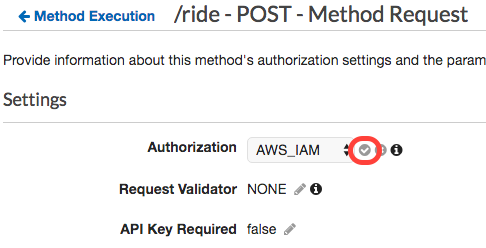
Save your selection by clicking the checkmark icon next to the drop down.

-
Next, choose the Actions button at the top of the resources list.
-
Choose Deploy API from the list of options presented.
-
For deployment stage, select
prodthen click Deploy. -
You’ve now successfully deployed your new authentication integration to your API’s production environment.
Configure your Wild Rydes web app to authenticate API requests
Now that you’ve deployed the new authorizer configuration to production, all API requests must be authenticated to be processed.
-
Return to your Wild Rydes app, sign in at /signin if necessary, and attempt to request a ride.
-
You should receive an Error finding unicorn. If you open the developer console, you will see that we received a HTTP 401 error, which means it was an unauthorized request.
If at first your requests go through without any errors, try requesting a ride again in 30-60 seconds to allow time for the API Gateway changes to fully propagate.
-
Go back to Cloud9 and open the /website/src/pages/MainApp.js files.
-
Update your current getData method to the following method, which removes the Authorization header and adds debugging information to show us the request signature as requests are sent. The default behavior of the AWS Amplify library is the sign all requests with SigV4 signing when no authorization header is specified, so this will automatically sign all requests using this algorithm without extra development effort. Save your changes after making this update.
async getData(pin) { Amplify.Logger.LOG_LEVEL = 'DEBUG'; const apiRequest = { body: { PickupLocation: { Longitude: pin.longitude, Latitude: pin.latitude } }, headers: { 'Content-Type': 'application/json' } }; console.log('API Request:', apiRequest); return await API.post(apiName, apiPath, apiRequest); } -
Allow the application to refresh, sign-in again, and request a ride.
-
The unicorn ride request should be fulfilled as before now. To see the full request headers which were sent, look at the developer console for an message which includes the API Request details, including the full signature and headers of the request.
This message starts with POST /prod/ride then shows the headers of the request made.
You may notice that there were both x-amz-date and x-amz-security-token headers sent among other headers. These two headers are part of the overall request signature, along with the Authorization header.
If your API now invokes correctly and application functions as expected summoning unicorns again, you can proceed to the next module, IAM-based Authorization.